How to Use Photoshop Brushes
Follow these 7 steps to go from a freshly loaded brush to confident, controlled strokes. Along the way you'll meet the panels, the shortcuts, and the settings that actually matter when you paint.
Everything below reflects Photoshop 2026, and nearly all of it applies unchanged to any version from the last decade. If you haven't loaded any brushes yet, start with our guide on how to install brushes in Photoshop, grab a set from our free brushes library, then come back here.
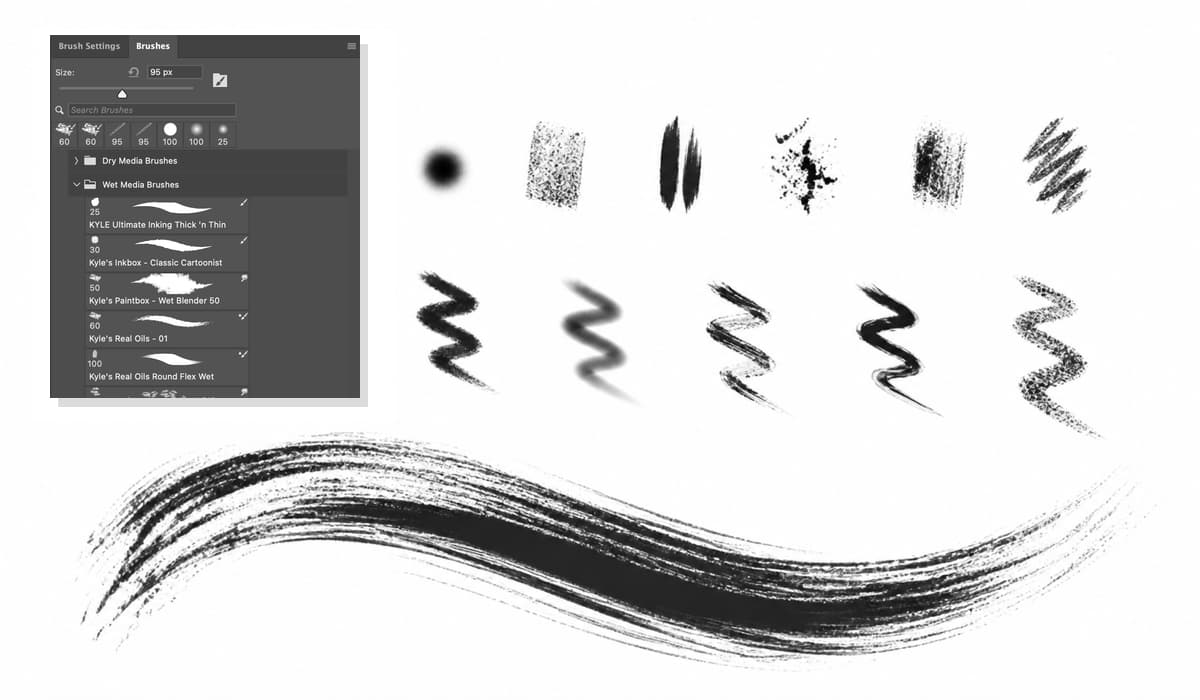
Before You Start: Tips, Presets, and Two Different Panels
A little vocabulary saves a lot of confusion later, because Photoshop uses two similar-sounding terms and two similar-sounding panels:
- A brush tip is the raw stamp shape: the grayscale image Photoshop repeats along your stroke. Every brush you download or create yourself is, at its core, a tip.
- A brush preset is a tip plus saved behavior: spacing, dynamics, transfer settings, optionally even size and color. When you pick a brush in the Brushes panel, you're picking a preset.
The two panels split the work the same way:
- Window → Brushes is your library. This is where loaded brushes live, organized into folders, and where you select which brush to paint with.
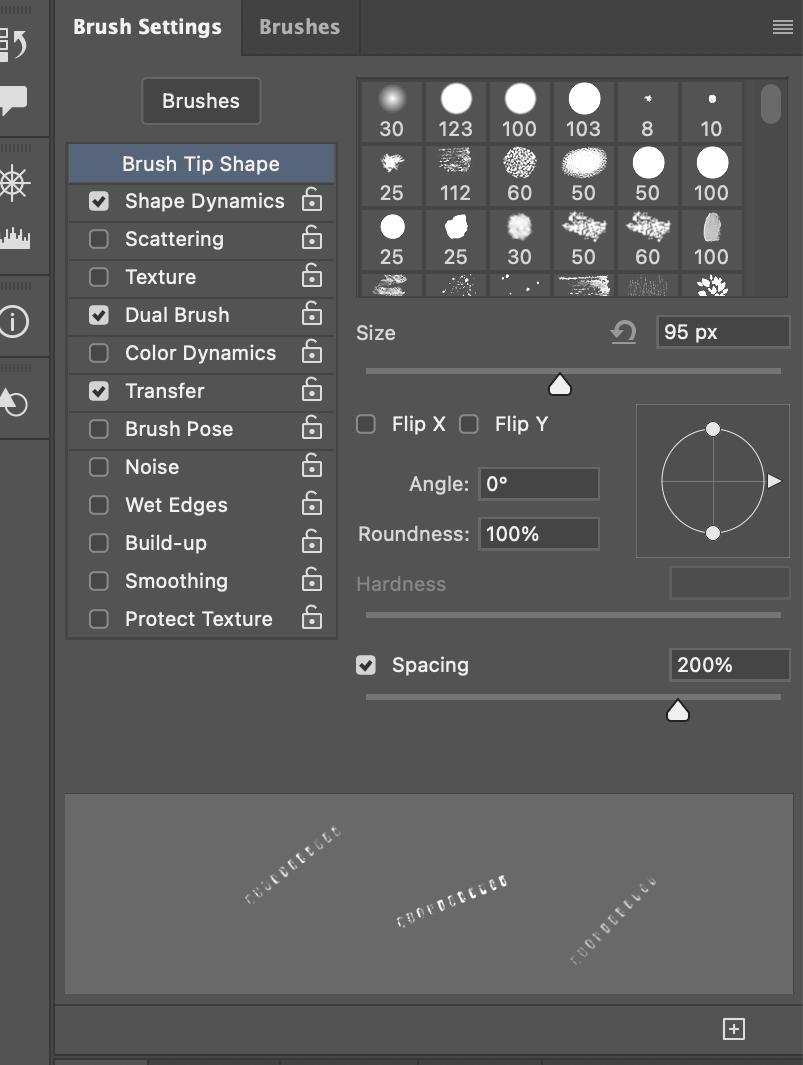
- Window → Brush Settings (or F5) is the engine room. This is where you change how the selected brush behaves: spacing, shape dynamics, scattering, transfer, and more.
One more thing worth knowing up front: brush settings belong to the tool, not the document. Whatever size, opacity, and mode you leave the Brush tool in is what you'll get tomorrow, in a different file. If a brush ever behaves strangely, the answer is almost always "a setting left over from last time". The troubleshooting section at the end covers the usual suspects.
Step 1: Open the Brushes Panel and Pick a Brush
Select the Brush tool (press B), then open Window → Brushes.
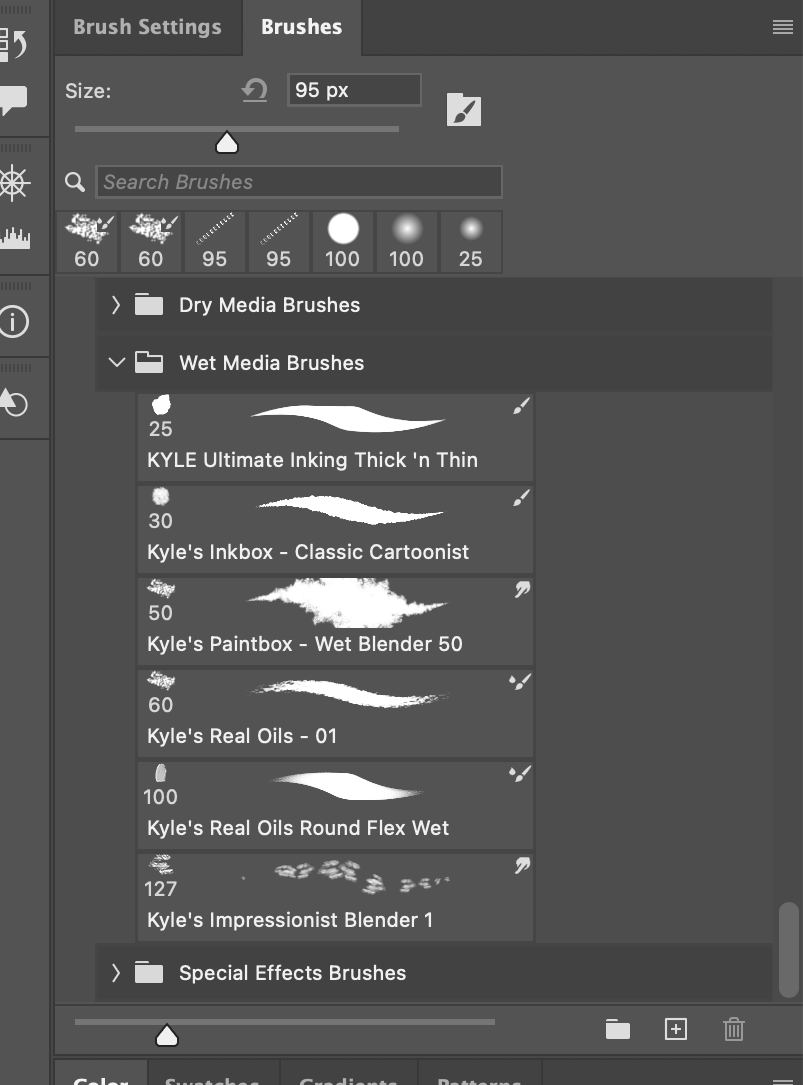
The panel shows every brush currently loaded, grouped into folders. Click a folder's arrow to expand it, and click any brush to make it active. Three practical tips for navigating a large library:
- Resize the previews. The panel menu (the ☰ icon in the top-right corner) offers small to large thumbnails plus a stroke preview, which is far more useful than the bare tip shape for textured brushes.
- Use the search field at the top of the panel when you know part of a brush's name.
- Make your own groups. Drag brushes between folders, or use New Brush Group… from the panel menu. A "favorites" group with your five most-used brushes saves endless scrolling.
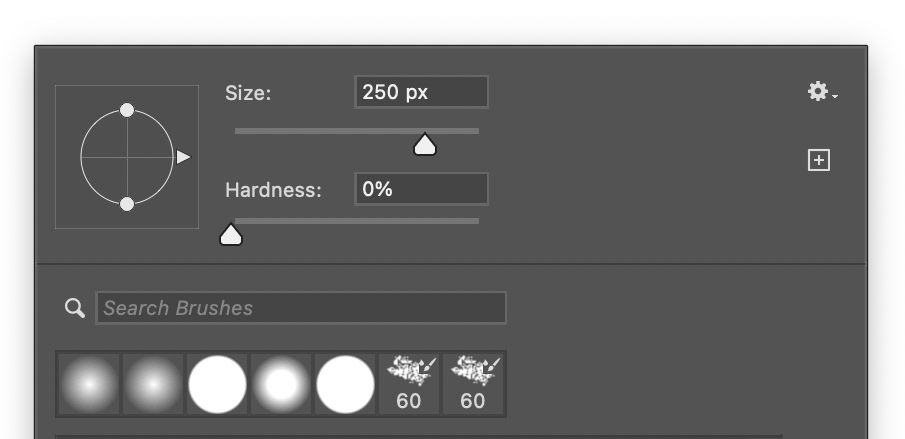
You can also get at the same library without the panel: with the Brush tool active, right-click anywhere on the canvas and the Brush Preset picker drops down under your cursor, complete with the size and hardness sliders. For quick brush switches mid-painting, this beats a trip to the panel every time.
Tip: If the brush you want isn't in the list, it isn't installed. The short version: open the Brushes panel menu and choose Import Brushes…, then point it at the .abr file. The long version, including drag-and-drop and what changed in recent versions, is in our installation tutorial.
Step 2: Set Size, Hardness, and Spacing
These three settings shape every single stroke, so learn them before anything else.
Size is the diameter of the brush tip in pixels, up to 5000 px. Don't reach for the options bar; use the bracket keys:
- [ makes the brush smaller
- ] makes the brush larger
You'll use these constantly. For a bigger jump, hold Ctrl + Alt (Windows) or Ctrl + Option (Mac) and drag left or right on the canvas. Photoshop shows a live preview of the tip as you scale it.
Hardness controls how soft the edge fades, from a crisp 100% to a fully feathered 0%. The shortcuts are the same brackets with Shift:
- Shift + [ makes the edge softer
- Shift + ] makes the edge harder
Hardness only applies to round brushes. A sampled brush tip (which is what most downloaded brushes are) has its edge baked into the tip image, so the slider is greyed out. That's normal for a stamp, not a bug.
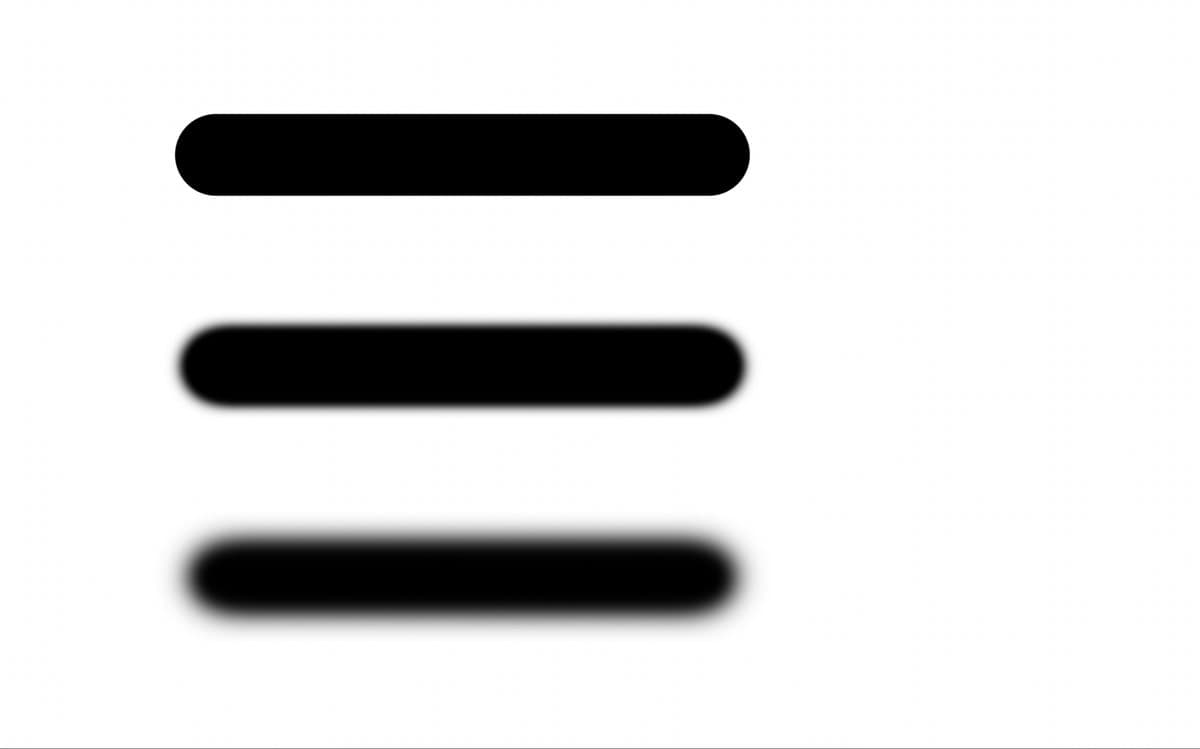
Spacing lives in Brush Settings → Brush Tip Shape. Photoshop doesn't draw a continuous line. It stamps the tip over and over along your path, and spacing is the gap between stamps as a percentage of the tip size. At 1–10% the stamps merge into a smooth stroke; at 100%+ each stamp sits separately, which is exactly what you want for scatter and texture brushes. If a downloaded brush paints as an unreadable solid band, spacing is the first thing to check.
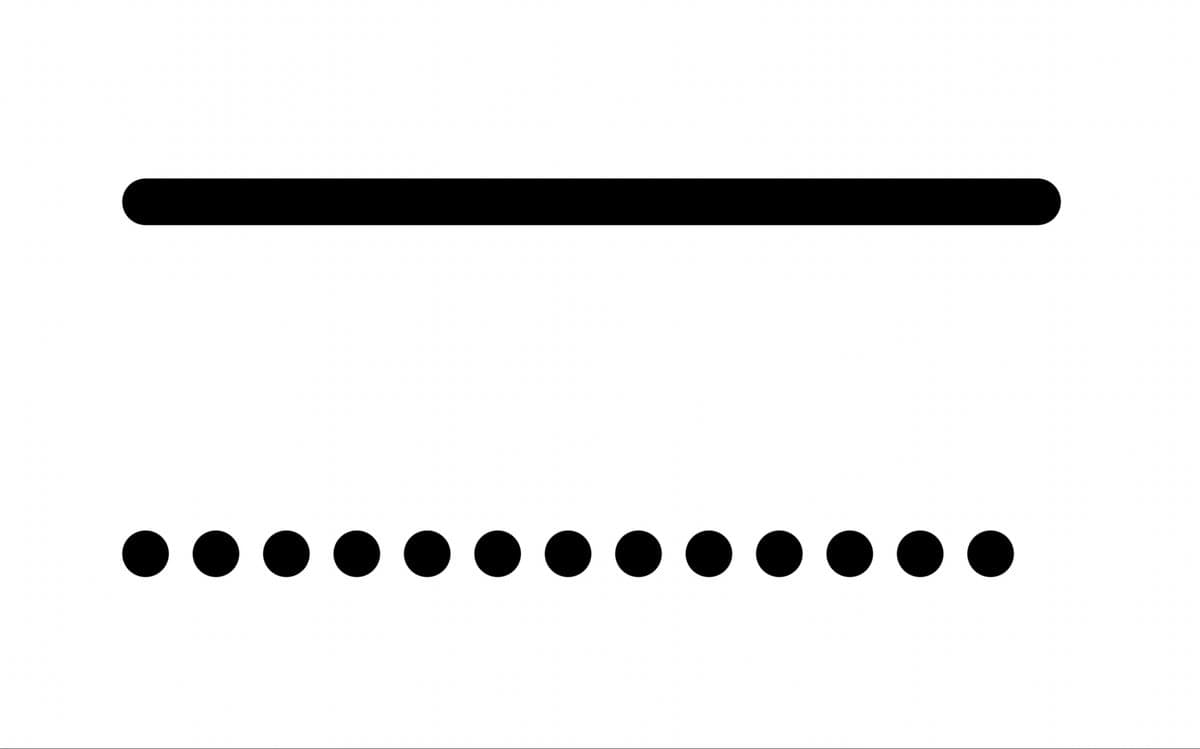
Common mistake: Painting with a soft brush at a huge size and wondering why everything looks airbrushed and muddy. Softness multiplies with size: a 2000 px brush at 0% hardness feathers across hundreds of pixels. When digital paintings look "fuzzy", an oversized soft round brush is usually the reason.
Step 3: Control Opacity and Flow
The options bar puts Opacity and Flow side by side, and the difference between them is the single most useful thing to understand about the Brush tool:
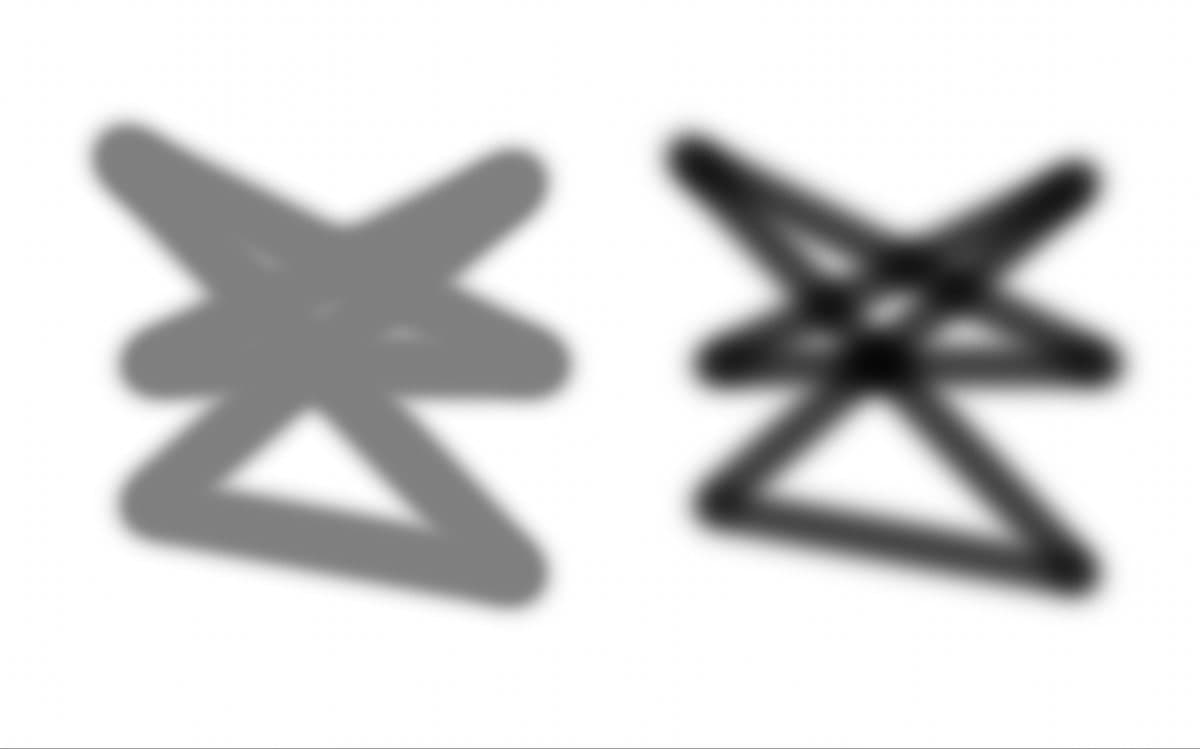
- Opacity caps how dark a single stroke can get. At 50% opacity, painting over the same spot within one stroke stays at 50%. The paint doesn't build up until you release the mouse and stroke again.
- Flow controls how fast paint is laid down within the stroke. At 50% flow, each pass of the cursor adds more paint, even without releasing, like a real airbrush.

Try it: set opacity 100% / flow 20%, then scribble over one area without letting go. The overlapping passes darken gradually up to full strength. Now set opacity 20% / flow 100% and do the same: the whole scribble stays a flat 20%.
The keyboard has both covered, with the Brush tool active:
- Number keys set opacity: 1 = 10%, 5 = 50%, 0 = 100%. Type two digits quickly for exact values (say, 2 then 5 for 25%).
- Shift + number keys set flow the same way.
The airbrush icon next to Flow adds one more behavior: with it enabled, holding the cursor still keeps feeding paint, exactly like holding down the trigger of a spray can. Combined with a low flow value it's the classic setup for soft shading.
Smoothing, a little further along the options bar, is worth a mention here: it delays the stroke behind your cursor and irons out hand wobble. 10–20% steadies line art noticeably; 100% is for slow, deliberate curves.
Step 4: Choose a Blend Mode
The Mode menu in the options bar sets how paint mixes with what's already on the layer, per stroke, without touching your layer structure. It's easy to overlook, because layer blend modes get all the attention, but two brush-only modes make it worth knowing:
- Behind paints only into transparent areas, as if working behind the existing paint on that layer. Great for slipping a color fill behind line art on the same layer.
- Clear turns the brush into an eraser with all the brush engine's dynamics: any textured brush becomes a matching textured eraser.
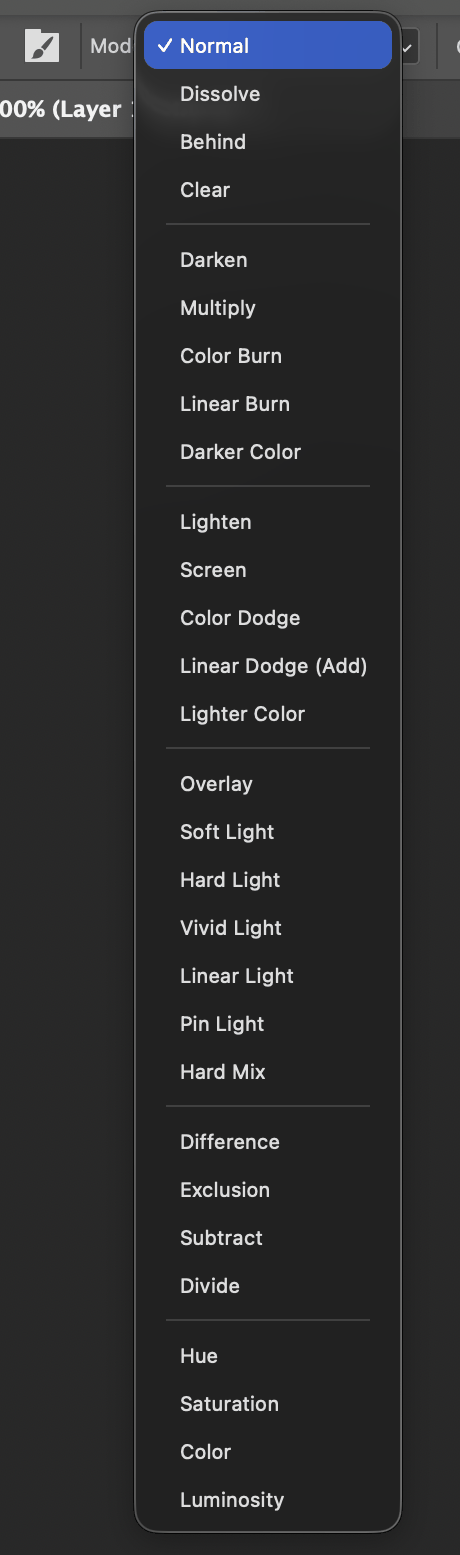
The familiar modes do what they do for layers, applied per stroke:
- Multiply darkens: every pass builds shadow, like layering ink washes.
- Screen lightens, useful for glow and haze.
- Overlay boosts contrast, for punchy highlights over existing color.
- Color repaints hue and saturation while keeping the luminosity underneath, the classic way to recolor without repainting the shading.
Tip: In practice you'll often get more flexibility from painting in Normal mode on a separate layer and setting the layer's blend mode instead, since you can change your mind afterwards. Reach for brush-level modes when you specifically want strokes to interact with each other within one layer, or for Behind and Clear, which have no layer equivalent.
Step 5: Add Pressure Dynamics
This is the step where a graphics tablet (or an iPad driving Photoshop remotely) changes everything. With pressure control wired up, one brush replaces ten: press lightly for a thin, faint stroke, press harder for a bold one.
Two sections of the Brush Settings panel (F5) do the wiring:
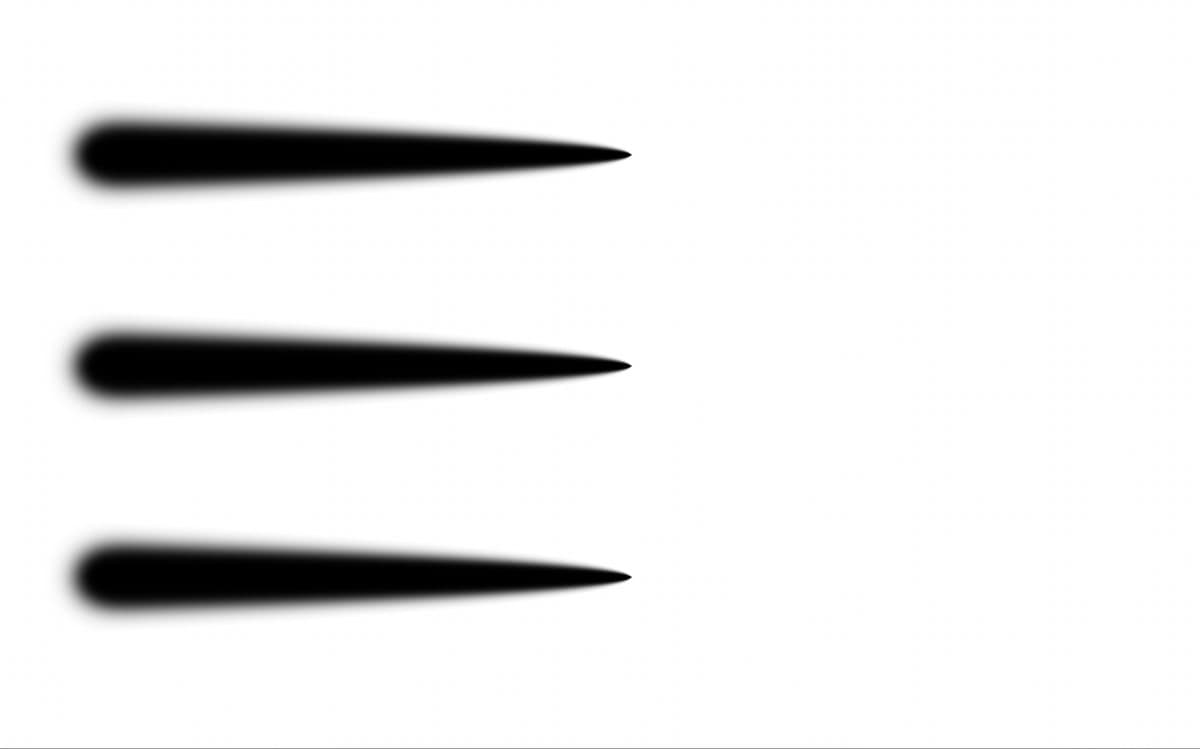
- In Shape Dynamics, set Size Jitter → Control to Pen Pressure. Now stroke width follows pressure. The Minimum Diameter slider below it decides how thin the lightest touch gets; around 10–20% gives elegant tapered line art.
- In Transfer, set Opacity Jitter → Control (and optionally Flow Jitter) to Pen Pressure. Now pressure controls how much paint goes down, which is the natural setup for shading and rendering.
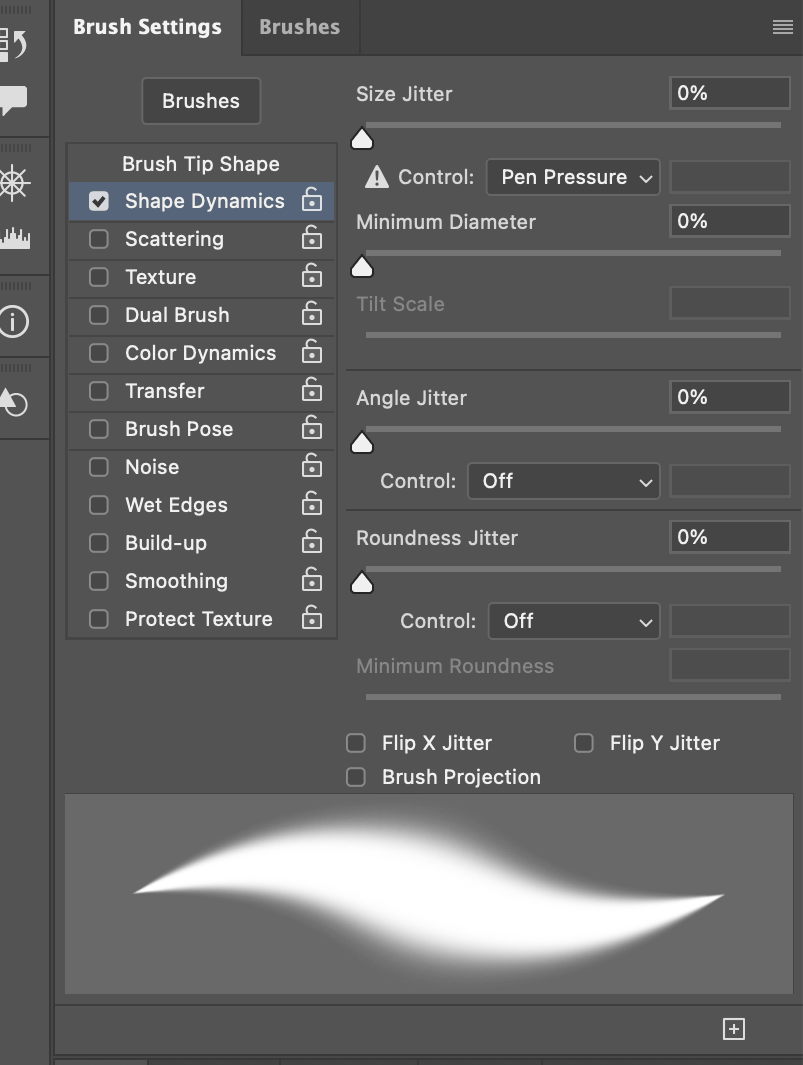
You don't have to dig into the panel every time. The options bar has two override buttons, pressure controls size and pressure controls opacity, that force pressure on regardless of the preset's own settings. Handy for quickly taming a downloaded brush that was saved without any dynamics.
While you're in Brush Settings, two neighbors are worth experimenting with:
- Scattering spreads stamps away from the stroke path: foliage, splatter, and particle brushes rely on it.
- Angle Jitter (under Shape Dynamics) rotates each stamp randomly, which stops a repeated texture tip from looking like obvious rubber-stamping.
No tablet? You still get controlled tapers with the fade control: set Size Jitter → Control to Fade and a stroke thins out over the distance you specify. And any Control dropdown showing a warning triangle simply means the input device it references isn't connected. The brush still works; that dynamic is just inactive.
Step 6: Paint on Layers, Not on the Background
The Brush tool commits pixels: there's no adjusting a stroke after the fact the way you'd tweak a shape or a smart filter. Layers are what keep that permanence from becoming a problem:
- Add a new layer for each element (Layer → New → Layer…, or Cmd/Ctrl + Shift + N). Line art on one layer, flat colors below it, shading above the colors.
- Painting over the background directly means every correction erases finished work. Painting on layers means corrections only ever touch one element.
- Lock transparency (the checkerboard icon at the top of the Layers panel) when shading an existing shape: your strokes then land only where that layer already has pixels, so nothing spills over the silhouette's edge.
- For the same effect with more flexibility, clip a layer to the one below it (Alt/Option-click the line between them in the Layers panel): the clipped layer's paint shows only inside the base layer's shape, but stays on its own layer.
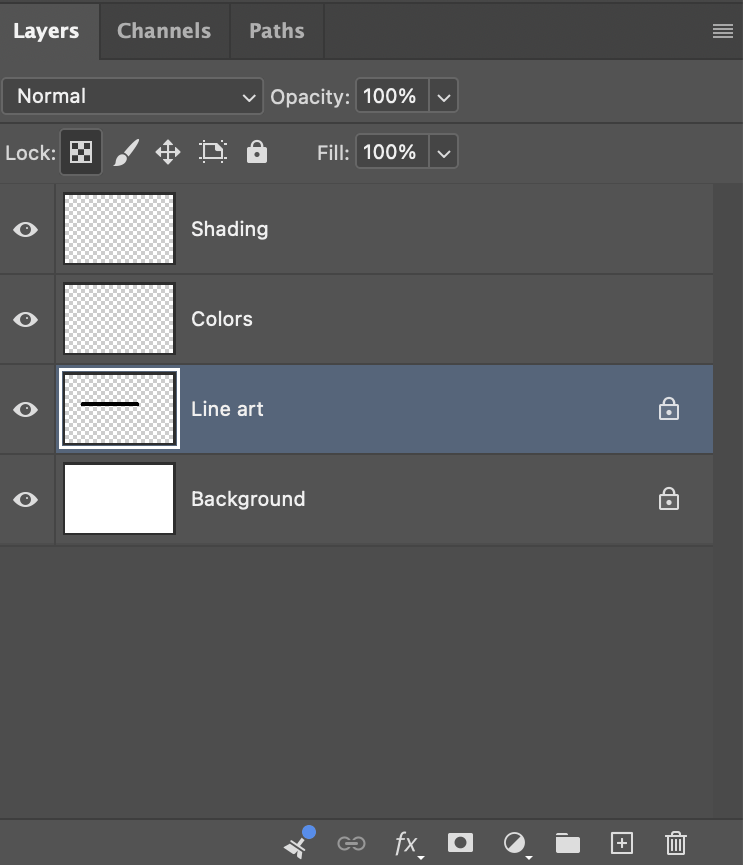
Common mistake: Doing a whole painting session on one layer "to keep things simple". The first time you need to move the character but not the background, or lighten the shading but not the line art, the simplicity evaporates. Layers are free; use them.
Step 7: Use Brushes on Layer Masks
A huge share of real-world brush mileage goes into painting masks rather than color. A layer mask is a grayscale map attached to a layer: where the mask is white the layer shows, where it's black the layer is hidden, and every gray in between is partial transparency. Sound familiar? It's the same grayscale logic brush tips themselves use.
The workflow:
- Select a layer and click Add layer mask (the rectangle-with-a-circle icon at the bottom of the Layers panel). A white thumbnail appears next to the layer; white means everything visible.
- Click the mask thumbnail to target it. Photoshop now paints into the mask, not the image. The extra border around the thumbnail tells you which one is active.
- Paint with black to hide parts of the layer, white to bring them back. Press D to reset the colors and X to swap between them. With those two keys you'll rarely touch the color picker while masking.
- Use a soft brush at low flow for gradual transitions (blending two photos, fading an adjustment) and a hard brush for clean cutout edges. Textured brushes shine here too: masking the edge of a composited element with a grungy brush beats a sterile soft-round fade every time.
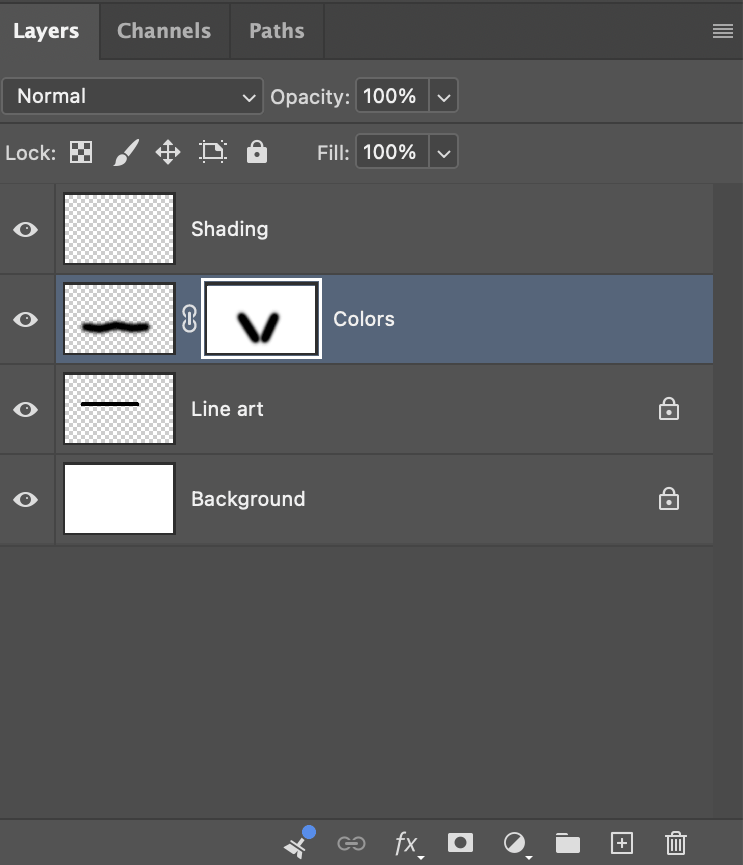
Because the mask is just grayscale pixels, every brush skill from steps 2–5 applies directly: pressure-controlled flow gives you beautifully gradual dodge-and-burn through masked adjustment layers, and that's a technique working retouchers lean on daily.
Tip: Shift-click the mask thumbnail to disable the mask temporarily (a red X appears), and press \ (backslash) to overlay the mask on the image in red so you can see exactly where you've painted. Nothing about a mask is permanent; that's the point.
A Word on Color
Brushes paint with the foreground color, the upper of the two swatches at the bottom of the toolbar. The essentials:
- X swaps foreground and background colors; D resets them to black over white.
- Alt/Option-click on the canvas temporarily switches the Brush tool to the eyedropper and samples the color under the cursor. It's the fastest way to pick colors while blending, and the reason experienced painters almost never open the color picker mid-stroke.
- Sampled (image-based) brush tips don't carry their own color: the tip's grayscale decides where paint lands and how opaque it is, while the foreground color decides what color that paint is. A black splatter tip painted with red foreground paints red splatter.
Saving Your Setup: Custom Presets
Once you've tuned a brush (size, spacing, dynamics, the lot), save it so the work isn't lost the moment you switch brushes: click the + (Create New Brush) button at the bottom of the Brushes panel. The dialog offers to capture the current size in the preset, and even the color if you want a brush that always paints in, say, your sketch blue. The saved preset appears in the Brushes panel like any downloaded brush, and exports into an .abr like any other. Our brush creation guide covers exporting and sharing in detail.
Troubleshooting: When the Brush Won't Behave
Every one of these has burned every Photoshop user at least once. Run down the list in order:
- Nothing appears when you paint. Check, in order: Is a selection active somewhere off-screen (Cmd/Ctrl + D to deselect)? Are you on the wrong layer, or on a hidden one? Is the layer's or the tool's opacity near zero? Is the brush Mode set to something invisible in context (white paint in Multiply mode, black in Screen)? Are you accidentally painting into a layer mask instead of the layer?
- The cursor is a tiny crosshair instead of a circle. You've pressed Caps Lock, which toggles the precise cursor. Press it again.
- Strokes are jagged or stepped. Spacing is too high for a smooth stroke, or Smoothing is at 0% and the mouse is doing the wobbling. Check both.
- Pressure suddenly stopped working. Restart Photoshop first (it's usually the tablet driver handshake), then check that the driver itself is running and that Shape Dynamics didn't get switched Off in Brush Settings.
- The brush paints a solid smear instead of separate stamps. Spacing again: a new or imported brush can arrive with spacing far too low. Brush Settings → Brush Tip Shape → raise Spacing.
- Everything about the tool feels wrong and you can't find why. Reset it: right-click the Brush tool's icon in the options bar (far left) and choose Reset Tool. This clears mode, opacity, flow, and airbrush back to defaults.
Frequently Asked Questions
What is the difference between opacity and flow in Photoshop?
Opacity caps how dark a single stroke can get; repeated passes within one stroke will not build past it. Flow controls how quickly paint accumulates within a stroke, so overlapping passes at low flow gradually darken, like a real airbrush. Set opacity 100% and flow around 20% for natural, buildable shading.
How do I change brush size with the keyboard?
Press the left bracket key [ to make the brush smaller and the right bracket ] to make it larger. Shift + brackets adjust hardness instead. For a visual resize, hold Ctrl + Alt (Windows) or Ctrl + Option (Mac) and drag horizontally on the canvas.
How do I make my brush respond to pen pressure?
Open Window → Brush Settings, then set Shape Dynamics → Size Jitter → Control to Pen Pressure for pressure-controlled width, and Transfer → Opacity Jitter → Control to Pen Pressure for pressure-controlled paint buildup. The options bar also has two override buttons that force pressure control for size and opacity on any brush.
Why is my Photoshop brush not painting anything?
The usual causes: an active selection restricting the paintable area (press Cmd/Ctrl + D), the wrong or hidden layer selected, tool or layer opacity near zero, a blend mode that is invisible in context, or painting into a layer mask instead of the layer. If all else fails, right-click the tool icon in the options bar and choose Reset Tool.
Can I use Photoshop brushes without a graphics tablet?
Yes. Every brush paints with a mouse or trackpad; you only lose pressure-driven variation. Substitute it with the Fade control in Shape Dynamics for tapered strokes, the Smoothing setting for steadier lines, and low Flow values for gradual buildup.
What is the difference between a brush tip and a brush preset?
A brush tip is the raw grayscale stamp shape that Photoshop repeats along a stroke. A brush preset is a tip plus saved behavior: spacing, dynamics, transfer, optionally size and color. The Brushes panel stores presets; the Brush Settings panel edits how the selected preset behaves.
Where can I download brushes to practice with?
Any .abr file works: load it via the Brushes panel menu with Import Brushes. Our site offers thousands of free Photoshop brush sets sorted by category, and an installation guide if you get stuck loading them.